| « 1 » | « 2 » | « 3 » | « 4 » | « 5 » | « 6 » | « 7 » | |||
|---|---|---|---|---|---|---|---|---|---|
| < 4-1 > | |||||||||
| < 4-2 > | |||||||||
| < 4-3 > | |||||||||
| < 4-4 > |
|
|
4-1. CelShading Plugin |
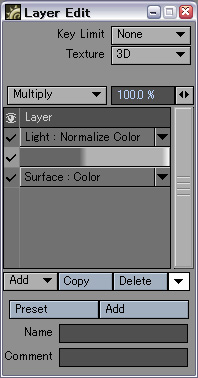
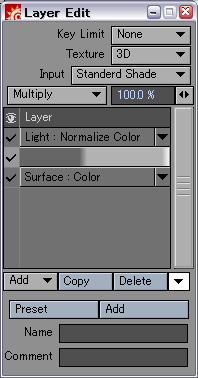
| 2. CelPainter Shader Main panel for LW8 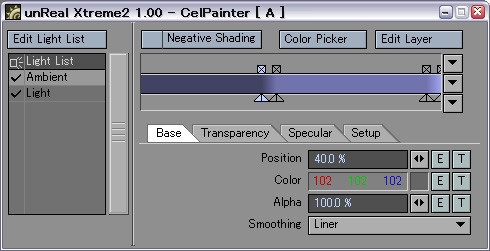 for LW9 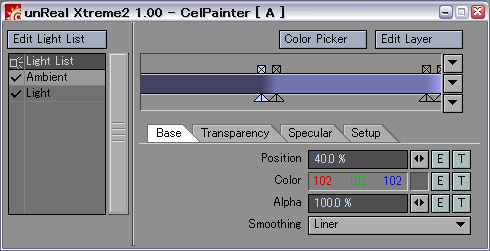
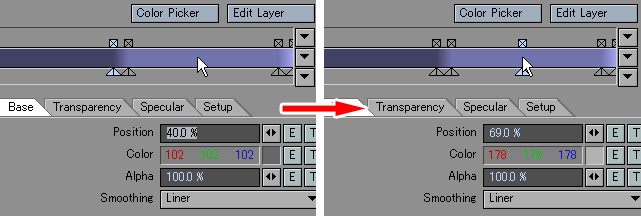
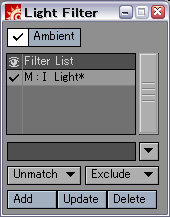
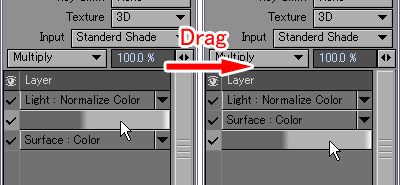
Details here What the check attaches beside the light name is the light which is enabled. Only the description of the selective light set up by CelPainter are displayed as this list. An exclusion of the light of the object set up by the Lightwave side, a diffusion of a light property, and reflective no effect setting are not taken into consideration. However, if a rendering execute, shading also including selective light setting by the side of Lightwave will be performed. When this check is enabled, the fraction exceeding 90 degrees is handled as a shading value of a negative. Details here Details here 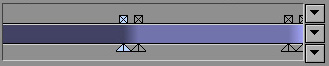 In this area, the display of gradient and the edit of a key position which are edited can be performed. It can be operated like standard gradient texture setting for Lightwave. The status of a layer that the parameter (base, speculer, transparency) chosen with the edit tab is chosen is displayed on the preview area of gradient.
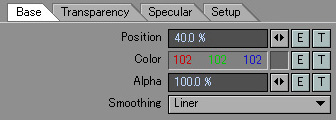 This area does a display of a parameter with a detailed key chosen in the key area, and an edit.
|
Color Picker Panel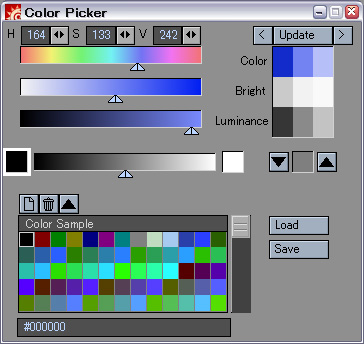 It can set up by the Color Picker panel, comparing the color of gradient each key with the color and luminance of neighboring keys. Moreover, the created color can be managed by a palette and an input/output of Swatch (extension .aco) of Photoshop is also possible for a palette.
The area is divided into three layer, a upper row displays a color, the middle displays the brightness of the color, and the lower berth shows the luminance. Although a color is darkish toward black in general shading in a dark section, a good result will be brought, if a color is chosen to set up the bright shade of an anime tone so that a brightness may fall adjusting a hue mainly and keeping up a luminance.
It is also possible to drag a triangular handle directly and to set it up in addition to a slider.  In this area, two colors are mixed, gradation is created and a new color can be created from there.
The name of the selected color is displayed on the text area of the palette lower part.
|
| 3.CP Instance Shader Main panel 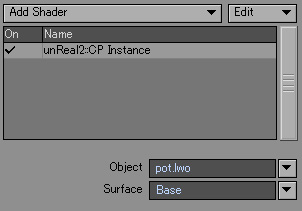 CP Instance shader is a plug-in which works as an instance of CelPainter set as other surfaces in a scene. Since the modification will be influenced also in CP Instance if CelPainter setting of a reference place is edited, it is effective to apply the same CelPainter setting as a lot of surfaces.
The object in the current scene can also be chosen from a popup. The list of the surfaces contained in a reference object can be displayed and chosen from a popup. |
| ∧ Top ∧ |